Introduction
In Smart Tiles every tile is edited where it is shown: on the page, in edit mode. There is no separate list of links to maintain. This article describes the editing tools of a single tile — adding, the Properties dialog, the context menu, reordering and removal. The look of a tile — colors, icons, images and sizes — is covered in its own articles, linked at the end.
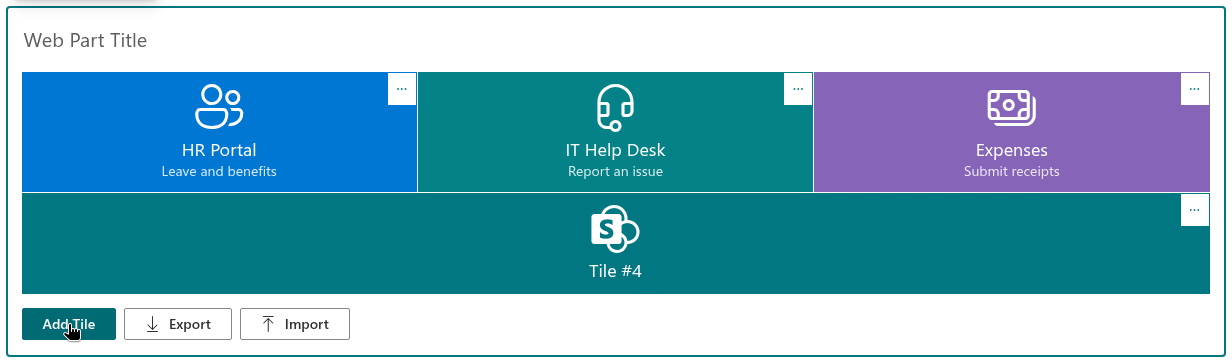
To follow the steps, open the page in edit mode. The web part then shows the Add Tile, Export and Import buttons under the tiles, and a … button in the top-right corner of every tile.
Adding a tile
Click Add Tile below the panel. A new tile appears at the end with a placeholder title (Tile #4, for instance), the first accent color of the theme, white text, a SharePoint icon and a placeholder link that points nowhere. Open its properties straight away to give it a title and a link.
The context menu
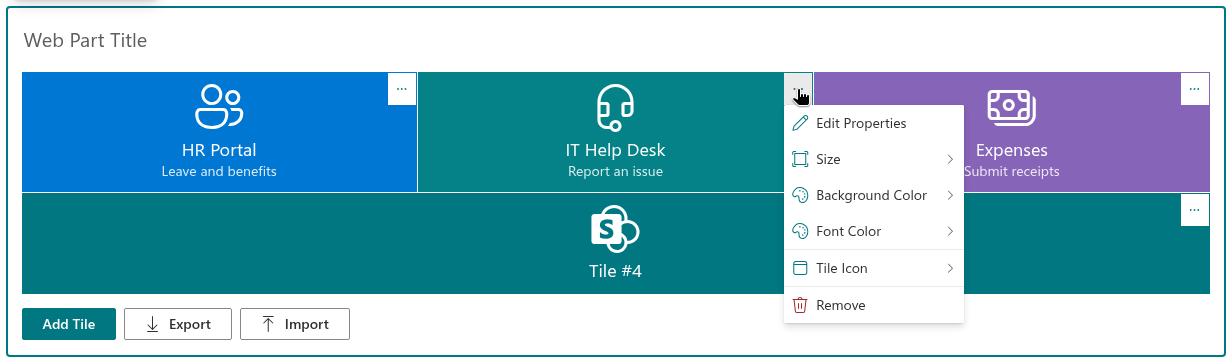
Click the … button in the corner of a tile to open its context menu. Everything that can be changed about a tile starts here:
| Item | What it does |
|---|---|
| Edit Properties | Opens the Properties dialog with the texts, the link, the target and the audience of the tile. |
| Size | Chooses one of six widths, from Extra Small to Full Width. |
| Background Color | Chooses a background color, a background image or — for YouTube links — the video thumbnail. |
| Font Color | Chooses the color of the title, the description and the standard icon. |
| Tile Icon | Opens one of the five icon sets or lets you pick a custom image. |
| Remove | Deletes the tile. |
The Properties dialog
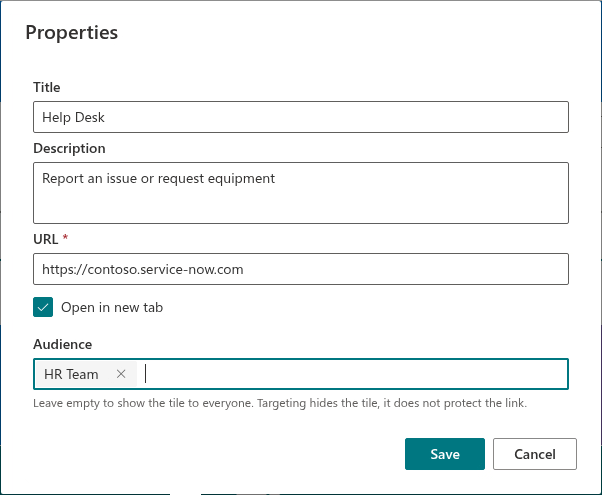
Choose Edit Properties to open the dialog. It can be dragged aside by its title bar so that the tile stays visible while you edit it.
| Field | Description |
|---|---|
| Title | The text on the tile. It is shown on one line; a title that does not fit is cut off with an ellipsis, so keep it short. |
| Description | An optional second line in smaller text, also shown in the tooltip of the tile. Up to two lines can be typed, but the tile shows the description on a single line. |
| URL | The link the tile opens. Required; the formats accepted are listed below. Save stays disabled while the link is not valid. |
| Open in new tab | Opens the link in a new browser tab instead of the current window. The option is unavailable for links that open an application (e-mail, phone, text message, Teams), because such links never open a tab. |
| Audience | SharePoint groups of the site or Microsoft Entra ID groups whose members see the tile. Leave the field empty to show the tile to everyone. |
Click Save to apply the changes, or Cancel to discard them.
Accepted link formats
| Link | Example |
|---|---|
| Web address | https://contoso.sharepoint.com/sites/hr |
| Path on the current tenant | /sites/hr/Shared Documents/Handbook.pdf |
| Anchor on the current page | #benefits |
mailto:helpdesk@contoso.com | |
| Phone number | tel:+15551234567 |
| Text message | sms:+15551234567 |
| Microsoft Teams | msteams:/l/chat/0/0?users=helpdesk@contoso.com |
A relative path is the safest form for content on the same tenant: the link keeps working when the panel is exported to another site or the site is moved.
📝 Note
Links to YouTube videos (youtube.com, youtu.be) are recognized automatically. The tile gets a play button instead of its icon, and the Background Color menu offers the video Thumbnail as the background.
Reordering tiles
Drag a tile to a new position with the mouse; the other tiles move aside to make room. The new order is saved with the page.

Targeted tiles in edit mode
A tile with an audience shows a small people icon in its top-left corner in edit mode, so that targeted tiles can be told from the others. In edit mode the author sees every tile regardless of its audience; the filtering applies to the published page.
Removing a tile
Choose Remove in the context menu. The tile disappears immediately, without a confirmation. If a tile was removed by mistake, close the page without saving — or use the version history of the page to restore an earlier version.
❗ Important
Changes to tiles are stored in the page. They become visible to visitors only after the page is republished; until then visitors see the previous version of the panel.
💡 Tip
To change the look of a tile, see KB10043. Tile Colors in Smart Tiles, KB10243. Choosing Icons for Tiles, KB10245. Setting a Background Image for a Tile and KB10247. Tile Sizes and Layout in Smart Tiles.
Learn more about the product: https://vitextra.com/en/products/smart-tiles