Short URL Online
Introduction
In the Short URL Management web part you can create a link, change the address that a link leads to, rename it, and delete links you no longer need. The commands you see depend on how many rows are selected in the list.
| Selected rows | Commands on the command bar |
|---|---|
| None | New Link |
| One | Edit, Delete |
| Several | Delete with the number of selected rows, for example Delete (3) |
At the right end of the command bar, the Refresh icon is always available.
Create a link
- Make sure no row is selected, then click New Link. The New Item panel opens on the right.
- Fill in the form (see the table below).
- Click Create. The message Save completed successfully. appears.
- Click Cancel to close the panel. The list is reloaded and shows the new link.
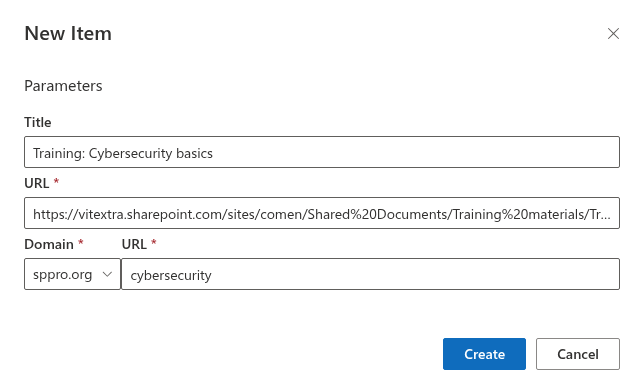
The fields of the panel
The Parameters section contains:
| Field | Description |
|---|---|
| Title | An optional name of the link, up to 300 characters. |
| URL (first field) | The address that the short link leads to. Required, up to 3000 characters. |
| Domain | The domain of the short link. Required. |
| URL (second field, next to Domain) | The short name. Required, up to 200 characters. |
📝 Note
Both fields are named URL. The first one is the full address of the target; the second one, next to the domain, is the short name that becomes part of the short link.
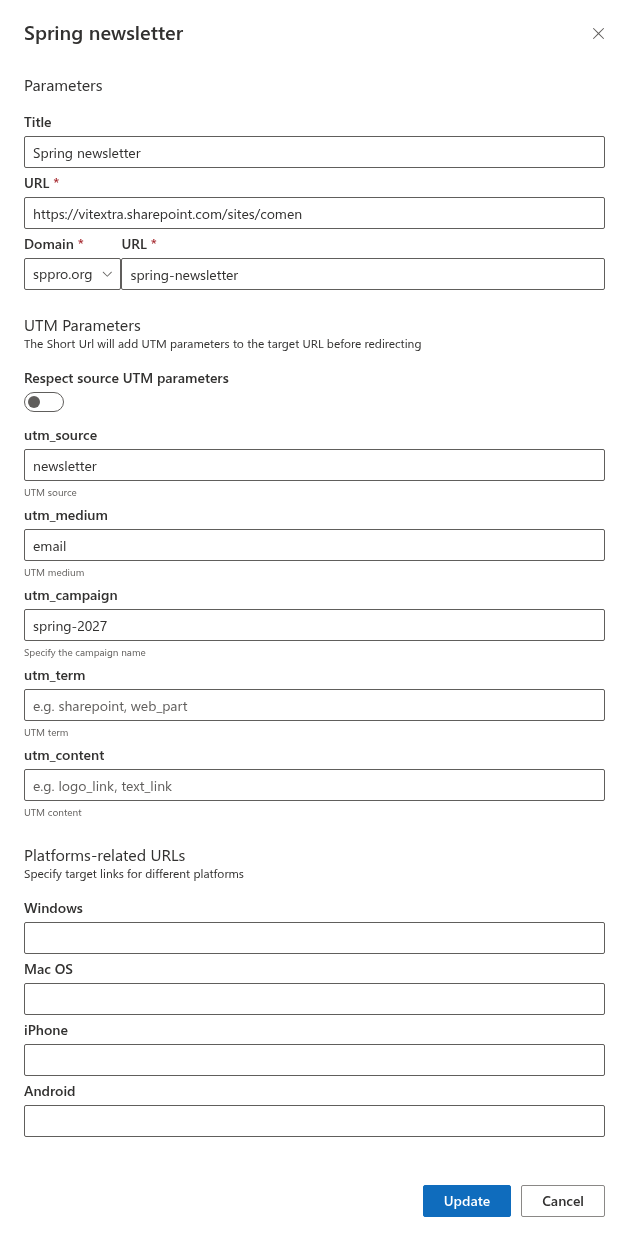
For an existing link, the panel also contains the UTM Parameters and Platforms-related URLs sections. They do not appear when you create a new link; add them after the link is saved.
Edit a link
- Select the link in the list (click the check circle at the left of the row, or click anywhere in the row).
- Click Edit on the command bar. You can also open a link by double-clicking its row or by pressing Enter on it.
- The panel opens with the title of the link in its header (or Untitled when the link has no title).
- Change the fields and click Update.
- When Save completed successfully. appears, click Cancel to close the panel. The list reloads and shows the changes.
❗ Important
Saving the panel does not close it. Use Cancel to close the panel; the list is refreshed when it closes. Changes that you have not saved with Update are lost.
Messages
- This field is required under URL means that the target address or the short name is empty.
- This name already exists. You must specify a unique name. means that another link already uses the short name. Choose a different name; see KB10473. How to Choose a Domain and Customize the Short Name of a Link in Short URL Online.
- Any other message appears in a red message bar above and below the form.
Delete links
- Select one or more rows. Use the check circles, or the check box in the header to select or deselect all the rows of the page.
- Click Delete. For several rows the command reads Delete followed by the number of selected rows in brackets.
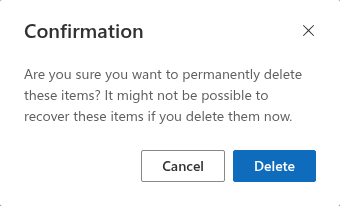
- A Confirmation dialog appears. For one link it asks Are you sure you want to delete this item? For several links it warns that the items will be deleted permanently and that it might not be possible to recover them.
- Click Delete to confirm, or Cancel to keep the links.
The web part tries to delete every selected link even if some of them fail. If an error occurs, the list is reloaded and the first error message is shown above the list.
❗ Important
A deleted short link stops working. Do not delete links that have already been published in documents, emails or printed materials unless you are sure they are no longer needed.
💡 Tip
To change only where a published link leads, edit the URL target instead of deleting the link and creating a new one with the same name. The short link then stays the same.