How to Display Azure DevOps Query Results in SharePoint Online
In today's fast-paced development environment, seamless integration between tools is crucial for maintaining productivity and efficiency. One powerful combination is SharePoint Online and Azure DevOps. By integrating these two platforms, teams can leverage the collaborative features of SharePoint while accessing real-time data from Azure DevOps.
This guide will walk you through the process of installing and configuring the Azure DevOps Query Viewer Web Part in SharePoint Online to display Azure DevOps Query results.
Whether you're a developer looking to streamline your workflow or an administrator aiming to enhance your team's project management capabilities, this step-by-step guide will help you set up and customize the web part to meet your specific needs.
1. Prerequisites
Prerequisites Ensure the following prerequisites are met:
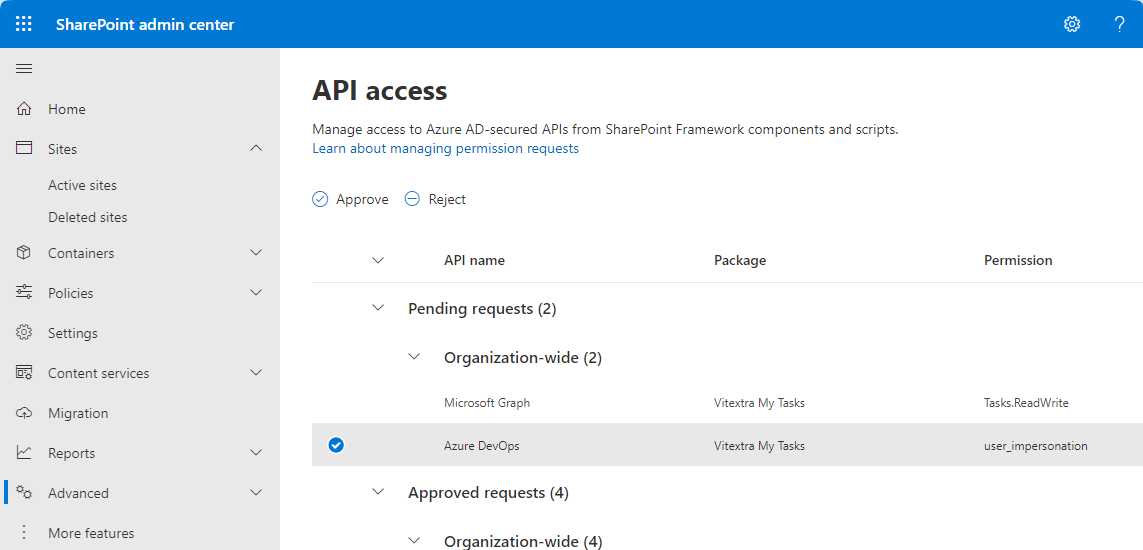
Approved API Access for SharePoint Solution
- Grant necessary permissions to interact with Azure DevOps REST APIs.
Access to Azure DevOps Organization
- Have an active Azure DevOps account.
- Be a member of the Azure DevOps organization where the queries are stored.
Necessary Permissions
- Ensure end users have read access to projects and queries in Azure DevOps.
💡 Tip
For detailed instructions on the installation process, please refer to the article How to Install a Vitextra Product in SharePoint Online.2. Adding the Azure DevOps Query Viewer Web Part
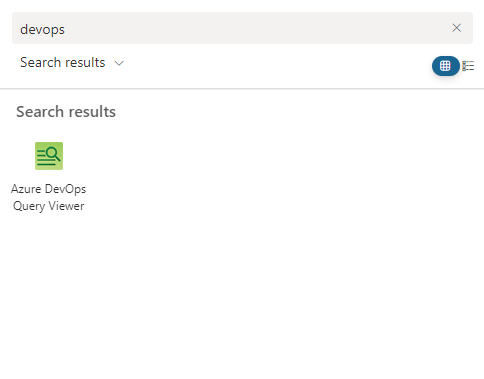
Adding the Azure DevOps Query Viewer Web Part To add the Azure DevOps Query Viewer Web Part to your SharePoint Online page, start by navigating to the page where you want to add the web part. Click on the "Edit" button to enter edit mode. Next, click on the + icon to add a new web part. A list of available web parts will appear. Search for the Azure DevOps Query web part in this list.
Once you find it, select the Azure DevOps Query web part to add it to your page.
3. Data Source Configuration
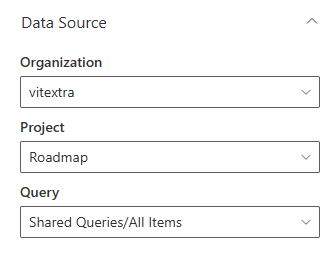
Data Source Configuration Click on the Edit Web Part icon (pencil icon) or Configure Web Part button to open the configuration pane.
Select the following options:
- Azure DevOps Organization.
- Project from which you want to display query results.
- Query you want to display.
❗ Important
The Azure DevOps Query web part currently supports only flat queries.4. Display Options
Display Options 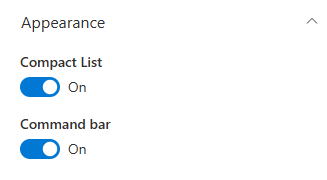
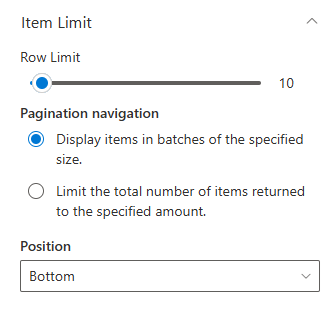
Display Options Next, adjust the display options according to your preferences. Use the Row Limit slider to choose how many work items you want to display. If you want to enable pagination, select the option to display items in batches of the specified size and choose the position of the pagination control (top, bottom, or both).
If you prefer to disable pagination, select the option to limit the total number of items returned to the specified amount and specify the desired amount.
Finally, customize the appearance settings to fit your needs. You can enable the Compact List option to display the details list in a more condensed format, which is useful for fitting more information on the screen without requiring extensive scrolling.
Additionally, you can enable the Command Bar to provide users with quick access to various actions and commands related to the displayed query results, such as refreshing the data or exporting to Excel.
5. Finalizing and Viewing Results
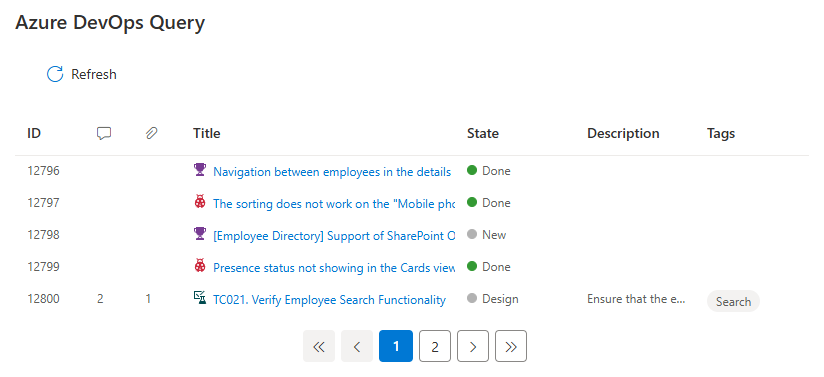
Finalizing and Viewing Results After configuring the web part, save and publish your changes to the SharePoint Online page. This will ensure that the Azure DevOps Query results are displayed correctly.
Once the changes are published, navigate to the page to verify that the query results are being displayed as expected.
This final step confirms that the integration is successful and that your team can now view real-time data from Azure DevOps directly within SharePoint.
6. License Assignment (Optional)
If you are using a Vitextra product, you may need to assign a license to continue using the Azure DevOps Query Viewer Web Part after the trial period ends. To purchase and assign a license, follow these steps:
To purchase and assign a license select the product you need. Choose between a monthly or annual subscription and complete the purchase process by adding the product to your cart, reviewing your selection, and entering your billing information.
After purchasing, assign the license to your SharePoint Online environment. Ensure that the license is applied to the correct tenant where the product will be used. For detailed instructions on purchasing and assigning licenses, please refer to the article here.
Integrating Azure DevOps Query results into SharePoint Online using the Azure DevOps Query Viewer Web Part provides a powerful way to enhance your team's collaboration and project management capabilities. By following the steps outlined in this guide, you can seamlessly display real-time data from Azure DevOps within SharePoint, ensuring your team always has access to the latest information.
This integration not only boosts productivity but also consolidates project management tools, reducing the need to switch between different platforms. With customizable display options, you can tailor the web part to meet your specific needs, making it easier for your team to stay informed and aligned with project goals.
How to
Step-by-step guides